Makes 8 cutlets
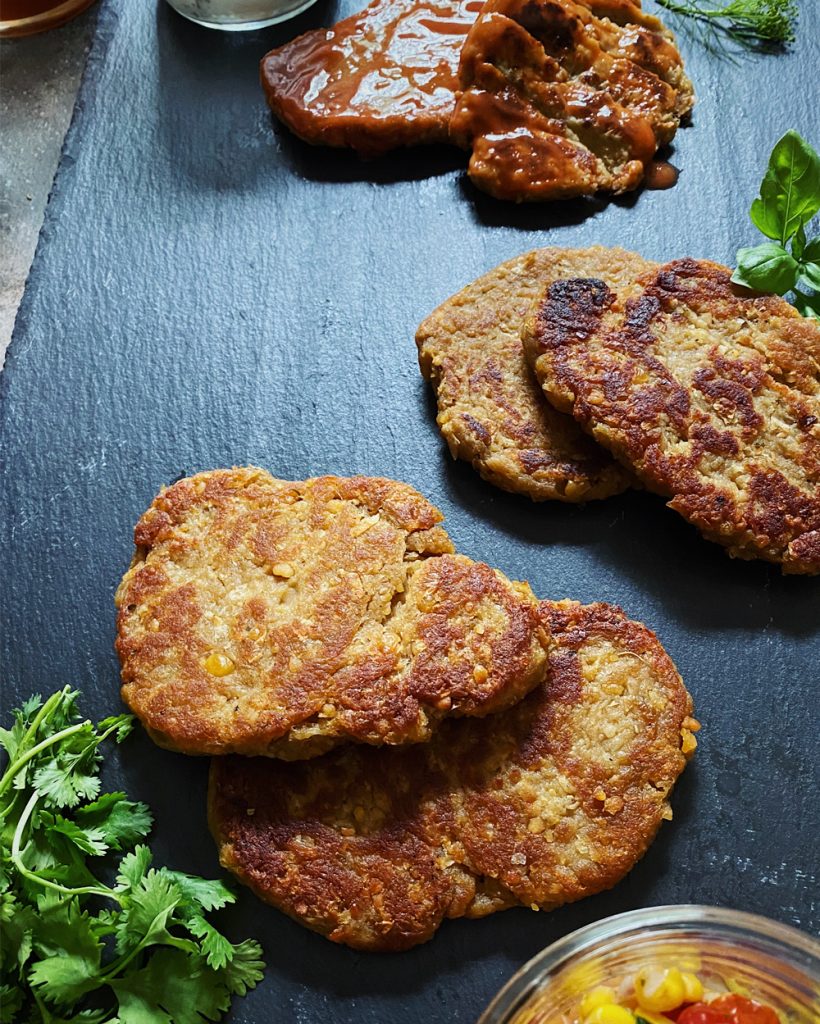
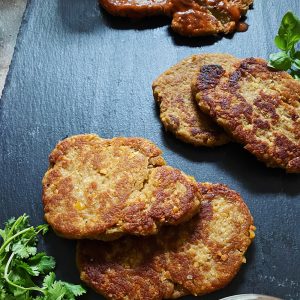
Chickpea Cutlets – vegan chicken cutlets from scratch! This recipe is a Veganomicon favorite. Vegan food that will put your lonely steak knives to work. It tastes soooo much better than anything from the supermarket. And I suppose that’s why everyone loves them and you should make extra.
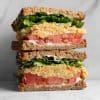
They’re perfect for tucking into sandwiches, making a vegan chick’n parmesan, slicing over a Caesar salad, slathering with gravy or BBQ sauce, or reheating for quick weeknight dinners. Use anywhere that a vegan chicken cutlet would fit in. They also hold up beautifully for meal prep, which is something I appreciate more and more as time goes on.
I’ve pared down the ingredient list slightly from the original cookbook, but just slightly. And because people always ask, there are now food processor instructions. Hopefully that makes these homemade vegan cutlets even easier and more foolproof than before (and they were already pretty easy.)
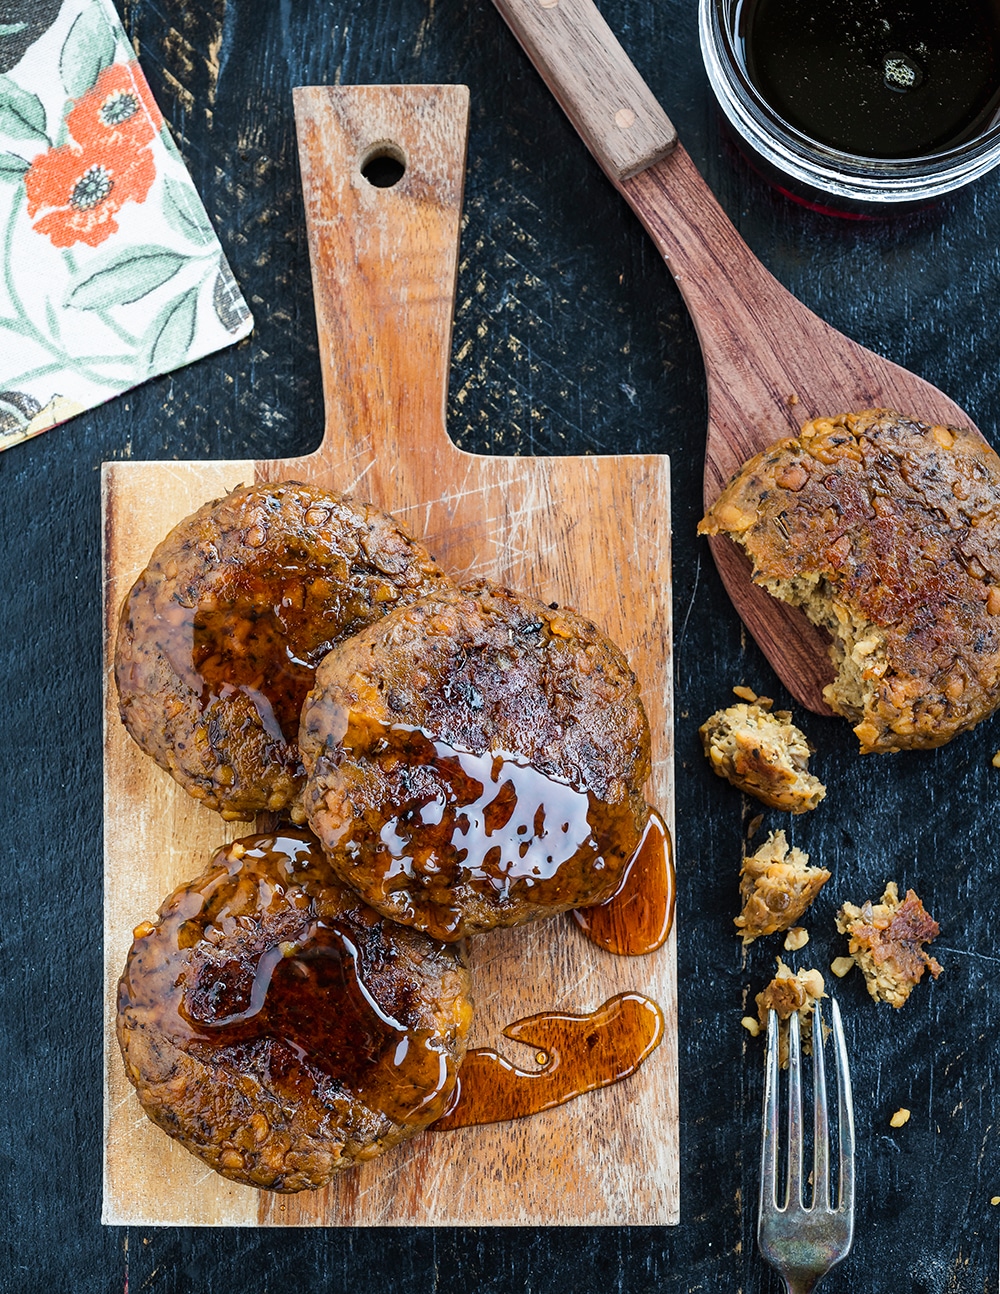
The texture you want is firm and lightly crisp on the outside, chewy and structured on the inside. Let the cutlets rest for about 10 minutes after cooking before slicing into them. That short rest helps everything set so you get clean slices and the best bite.
This is what a vegan chicken cutlet is supposed to taste like, and once you go scratch, there’s no going back.
CHICKPEA CUTLETS FAQ
Can I bake them instead?
Yes, absolutely. Preheat your oven to 375°F and lightly oil a baking sheet or line it with parchment. Brush both sides of each formed cutlet with a little olive oil, then arrange them on the sheet. Bake for about 20 minutes, flip, and bake another 8 to 10 minutes, until firm and golden brown. Let them cool for a few minutes before serving so they can set up properly.
What can I use instead of breadcrumbs, and can I use panko?
Yes to the panko — it works great. The key is DRY crumbs. You can use ground-up crackers or flatbread. What doesn’t work well is homemade breadcrumbs made from fresh bread. They tend to hold too much moisture and throw off the texture.
What kind of vital wheat gluten should I use?
Vital wheat gluten can vary by brand. These vegan chickpea cutlets come out great with either Arrowhead Mills or Bob’s Red Mill, although Bob’s makes them slightly firmer and chewier.
Can I freeze them?
Yes! Let the cutlets cool completely, then store them in an airtight container or freezer bag with parchment between layers. Freeze for up to 3 months. Reheat in a skillet or in a 375°F oven until warmed through and lightly crisp again. They hold up beautifully, which is one more reason to make a double batch.
Since these are already doubled, can I double them again?
Uh huh. Make as many as you can. Quadruple it, why not?
Can I make these gluten-free?
I haven’t had success making a gluten-free version, since vital wheat gluten is what gives these their structure and chew. There are versions out there if you search, but I can’t personally vouch for them.
If You Like Chickpea Cutlets You Might Like:

Doublebatch Chickpea Cutlets
Ingredients
- 1 16 oz can chickpeas drained and rinsed
- 1/4 cup extra virgin olive oil
- 1 cup vital wheat gluten
- 1 cup plain breadcrumbs
- 1/2 cup vegetable broth or water
- 1/4 cup soy sauce
- 1 teaspoon dried thyme
- 1 teaspoon paprika
- 1/2 teaspoon dried sage
- Olive oil for pan frying
Optional ingredients:
- 4 cloves garlic pressed or grated with a Microplane grater
- 1 teaspoon grated lemon zest
Instructions
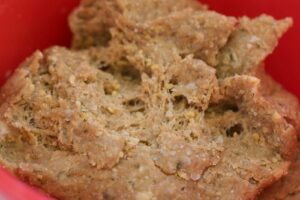
- In a mixing bowl, mash the chickpeas together with the oil until no whole chickpeas are left. Use an avocado masher or a strong fork. Alternately, you can pulse the chickpeas in a food processor. We’re not making hummus here, so be careful not to puree them, just get them mashed up. You can also sneak the garlic cloves in here instead of grating them, just pulse them up before adding the chickpeas. If using a food processor, transfer to a mixing bowl when done.
- Add the remaining ingredients and knead together for about 3 minutes, until strings of gluten have formed. The strings should look like this (click photo for an even closer up view):

- Preheat a large heavy-bottomed skillet over low-medium heat. Cast iron works best. If you have two pans and want to cook all the cutlets at once then go for it, otherwise you’ll be making them in two batches.
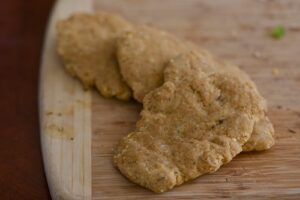
- Divide the cutlet dough into 2 equal pieces. Then divide each of those pieces into 4 separate pieces (so you’ll have 8 all together). To form cutlets, knead each piece in your hand for a few moments and then flatten and stretch each one into a roughly 6 by 4 inch rectangular cutlet shape. The easiest way to do this is to form a rectangle shape in your hands and then place the cutlets on a clean surface to flatten and stretch them. (OK, maybe my surface wasn’t that clean.)
- Add a moderately thin layer of olive oil to the bottom of the pan. Place the cutlets in the pan and cook on each side for 6 to 7 minutes. Add more oil, if needed, when you flip the cutlets. They’re ready when lightly browned and firm to the touch. I’ve found that they cook more thoroughly if I cover the pan in between flips. I also use my spatula to press down on them while they’re cooking, that way they cook more evenly.
- Now let them rest for a bit and you’re done!


Have you ever used Bob’s chickpea flour instead of actual chickpeas?
No Janet, I think that would taste like falafel!
I agree
I haven’t had good luck subbing the chickpea flour for actual peas in much of anything.
Lorin, I totally agree with you
_______________________________
Malcolm – if you need help with coursework just ask my coursework writing servive
the cutlets look wonderful! are those sesame seeds i see? were they a part of the breadcrumbs? or a separate ingredient?
I can’t wait to try these! Have you (or anyone) tried freezing them?
Yum! I can’t believe I had all the ingredients on hand, too.
Nope, no sesame seeds. It’s just the chopped up chickpeas. And yes, subbing chickpea flour is never a good sub for whole chickpeas.
these are probably my favorite things to make with chickpeas! they look great!
argh! that gravy on the picture makes me crazy…!
They bake well too. And they make awesome nuggets.
How long did you bake these for?
Can I use panko? I have that on hand, but I don’t know how well they’d turn out.
I usually double the Veganomicon recipe and then freeze half the batch to have cutlets anytime. I put parchment paper between each cutlet so they’re easy to separate.
Yay! I’m so excited that you posted this. I love the chickpea cutlets and have started making double batches of them. I actually love them with cheezy sauce. Thanks!
yesssss! these are the best!
i love this recipe! i’ve had good luck using gram flour in place of beans – i usually puree everything with the liquids, then add the gluten, then the gram flour until a malleable dough forms, knead it until it gets rather firm, then shape into a log.
i usually make a x4 recipe because we are both very busy and having leftovers makes everything so much easier… i either slice it and fry it, or cut it into several large pieces and simmer or bake them and then cut into strips for sammies.
Can’t wait to try these! On a toasted bun with pesto mayo and roasted peppers
Thanks Yvonne! Do you freeze them before cooking or after?
I never have storebought breadcrumbs around (the ingredients list on most is way too long for my liking), but I use quick-cooking oats instead. And while I can’t compare (never did make them with breadcrumbs), they come out great!
I always use Panko and they turn out great. I also have green them. They are not too bad, however maybe a little tougher.
Hi Amy, there’s a typo here – what did you mean when you wrote you also have green them?
Doubt Amy will remember what she was going to type 7 years ago.. 😉
I love these cutlets! I always quadruple the recipe and have plenty for the week. This is a weekly staple in our household. I usually use Back to Nature Stoneground whole wheat crackers for my breadcrumbs – I pulse them in my food processor. I don’t usually keep lemons on hand because once I get the peel they turn into rocks in my fridge, so I usually just add a tsp of lemon juice. For the perfect consistency (for us at least) I pan fry in olive oil to brown the cutlets and then bake for twenty minutes. always an incredible meal!
Can you post a recipe for the gravy featured in the picture. I’ve not had good luck with making vegan gravy that doesn’t come from a package. Gonna try the recipe for cutlets soon, looks great
Definitely a favorite recipe around here! I even make them when we go up to visit my nonveg family and they *love* them!
store bought bread crumbs?? That explains EVERYTHING!!! I cater, so I always have crusts of sandwich bread laying around, I never get around to drying them properly, I just rip them up into the food processor and away we go! And then I wonder why my cutlets don’t firm up in the middle… sigh. Thanks for the tip 😉
I am excited for the updated version! Will try. Everything looks delicious.
For lazy people: Put everything besides the wheat gluten in a blender, forgoing the bread crumbs (too much effort to make, seems silly to buy) blend until chickpeas and garlic and junk are well smashed, pour into a bowl and mix in the gluten with yo hands. I usually make a triple of the original (or 1.5X this posting, pull out your calculator (or brain)) so once you have it mixed up you can just flatten it over a decent sized (12″X17″) pan spreading over the whole pan yields a dec thickness – laying down some olive oil beforehand of course. Then bake for ~20 min at ‘roun 350 degrees Fahrenheit, cut it up into the desired sizes then flip, spraying on some oil if desired (takes effort). Bake for another ~10 min. Eat all in one sitting.
Donna: I freeze them before cooking. To use them I usually bake them, but you could pan fry them too. Would probably want to add some water and cover to help defrost. Hope that helps!
I make these on a regular basis. They are absolutely awesome!!!
This is a standard in our household (pairs really well with Chicago Diner Gravy) to the point that I know that the recipe is on page 133 without having to look it up! I change around the spices each time (green curry paste was a good addition), and it works with other beans besides chickpeas. Cannellini seems to work really well; lentils were the least successful as they produced dense pucks. Thanks for this recipe!
I always double the recipe! These are one of my favorites!
[…] Chickpea Cutlets – Isa just posted this updated recipe for a double batch. Honestly, if you’re going to make chickpea cutlets, you might as well make a bunch for sandwiches and stuff. Or you can just stand at the fridge and eat them if you’re sad and lonely like me. If you bake them instead of frying them, you can put them in the oven and do something else while they bake. […]
I made wayy too much hummus the other day. Think I can turn it into the chickpea cutlets?
Danica, I make a bunch of hummus monthly and freeze in one cup containers. Leave it in the frig to defrost and it’s perfect.
I did it! I couldn’t believe how easy it was to make these–and even my husband, a would-be-if-he-could-be lambetarian gave them a B+. I, on the otherhand, rated them an A. I baked them, minus the lemon zest because I was feeling lazy, and topped them off with some delicious Veganomicon mushroom gravy. Thank you, Isa! You’re amazing.
looks awesome!
i’d appreciate the nutritional info. 🙂
[…] Sprouts: Basic, Brown, Cow-Free Gravy » Happy Healthy Hottie: Discovering Gnocchi » The PPK: Doublebatch Chickpea Cutlets » Snarky Vegan: Mac ‘n Teese® Cheese Casserole » Go Mexico Guide: Black Bean Soup with […]
Yours are so much flatter than mine. I need to ponder this.
just made these tonight for about the third time and this time was the best for some reason. i also made the mushroom gravy and i usually make the mustard sauce.
this obviously isn’t going to please everyone, but i use wheat germ in place of bread crumbs. mostly because i never buy bread crumbs and i always have wheat germ but i think it tastes good and makes them firm.
I always make a double batch, but they still never seem to stick around for long. I think these may be my favorite things from Veganomicon.
What if we can’t find wheat gluten? Is there any substitute?
My husband has celiac. Is there a non wheat gluten sbstitute?
Yes, how to make them gluten free……
I’m with the above 2 commentors on ideas to substitute to make them gluten-free. Starch + xanthan gum + teff/sorghum flour maybe?
Re: GF cutlets – I wonder if some agar flakes would help hold them together, or if just xanthan gum would do the trick? For the flour I would probably do a mixture of teff, sorgum, millet, & buckwheat. I usually add a small amount of bob’s red mill white bean flour to recipes for some protein to help the consistency (works great), but since this whole thing is made of beans, I don’t think it’s necessary. I have make chickpea cutlets from another cookbook in the past and they were delicious, but fell apart. I can’t wait to try these!
I just remembered that Orgran has a product called “gluten substitute”.
One of my favorite recipes evah – but it never occurred to me to serve them for Thanksgiving! What a great idea!
I love this recipe… and you’re right, I also like the fact that I can eat with a steak knife for once!
Thank you for this great recipe. We made these for dinner last night (we celebrated our 28th anniversary – yay!) These would definitely be good for Thanksgiving or whenever we have guests over. So good!!
These look delicious. I am adding the ingredients to my shopping list right now. Thanks!
Oh boy, I made these last night and they were FANTASTIC. Nice and cripy on the outside. I too baked them in the oven. I formed them into cutlets as usual but I placed them on a baking sheet. I sprayed the baking sheet and the cutlets liberaly with olive oil and baked them at 375 (flipped them half way) It’s strange how much like a breaded chicken cutlet they look like. I am totally addicted to these now.
For those of you that are looking for a gf version, I’ve been making these for a long time and finally posted them earlier this year : http://veg-am.blogspot.com/2010/07/gluten-free-chickpea-cutlets.html
[…] Isa, the author of Veganomicon posted the recipe for a double batch of chickpea cutlets on her blog. The recipe as written in the book makes 4 smallish cutlets, which I can fly though in a day or […]